Over the previous several articles I’ve shared different approaches to sharing and communicating athlete data. Over this time I got a question about {shiny} apps and if I had a way to easily build in capabilities to save the report as a PDF for those times when you want to save the report as a PDF to email out or print the report and take it to a decision-maker.
Today I’ll go over two of the easiest ways I can think of to add some PDF save functionality to your {shiny} app. Before we jump in, if you are looking to just get started with {shiny} apps, aside from searching my blog for the various apps I’ve built (there are several!), Ellis Hughes and I did a 4 part series on building a {shiny} app from scratch:
- TidyX 25: Intro to shiny apps
- TidyX 26: Shiny apps part 1 – Creating an NBA dashboard
- TIdyX 27: Shiny apps part 2 – Adding tabs and improving UI
- TidyX 28: Shiny apps part 3 – K-nearest neighbor and reactivity
Alright, now to jump into building a {shiny} app with the ability to save as PDF. As always, you can access the full code to the article on my GITHUB page.
Loading Packages & Data
As always, we need to load the packages that we need and some data. For this, I’ll keep things simple and just use the mtcars data that is available in base R, since I’m mainly concerned with showing how to build the app, not the actual data analysis.
#### packages ----------------------------------------------
library(shiny)
library(shinyscreenshot)
library(DT)
library(gridExtra)
library(ggpubr)
library(tidyverse)

## data ----------------------------------------------------
dat <- mtcars %>%
  mutate(cyl = as.factor(cyl),
         car_type = rownames(.)) %>%
  relocate(car_type, .before = mpg)
App 1: Printing the app output as its own report
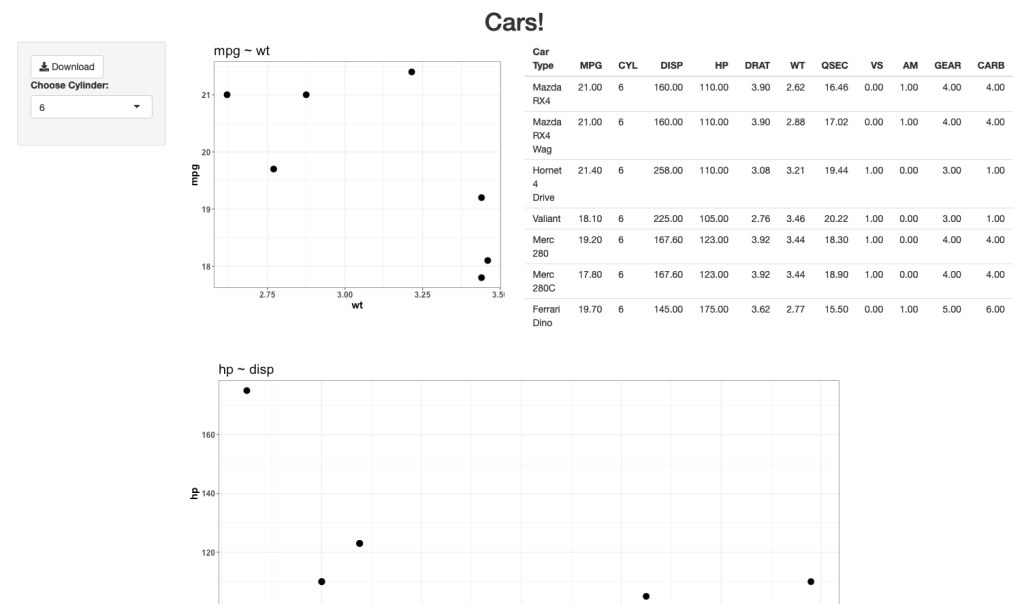
The user interface for this app will allow the user to select a Cylinder (cyl) number and the two plots and table will update with the available info.
The server of this app is where the magic happens. What the user sees on the web app is not exactly what it looks like when saved as a PDF. To make this version work, I need to store my outputs in their own elements and then take those elements and output them as an export. I do this by saving a copy within the render function for each of the outputs. I also create an empty reactive values element within the server, which sets each plot and table to NULL, but serves as a container to store the output each time the user changes the cylinder number.
You’ll notice in the output$tbl section of the server, I produce one table for viewing within the app while the second table is stored for PDF purposes. I do this because I like the ggtextable() table better than the simple base R one, as it has more customizable options. Thus, I use that one for the PDF report. Here is what the server looks like:
server <- function(input, output){

  ## filter cylinder
  cyl_df <- reactive({

    req(input$cyl)

    d <- dat %>%
      filter(cyl == input$cyl)
    d

  })


  ## output plt1
  output$plt1 <- renderPlot({

    vals$plt1 <- cyl_df() %>%
      ggplot(aes(x = wt, y = mpg)) +
      geom_point(size = 4) +
      theme_bw() +
      labs(x = "wt",
           y = "mpg",
           title = "mpg ~ wt") +
    theme(axis.text = element_text(size = 12, face = "bold"),
          axis.title = element_text(size = 15, face = "bold"),
          plot.title = element_text(size = 20))

    vals$plt1


  })

  ## output table
  output$tbl <- renderTable({

    tbl_df <- cyl_df() %>%
      setNames(c("Car Type", "MPG", "CYL", "DISP", "HP", "DRAT", "WT", "QSEC", "VS", "AM", "GEAR", "CARB"))

    # store table for printing
    vals$tbl <- ggtexttable(tbl_df,
                            rows = NULL,
                            cols = c("Car Type", "MPG", "CYL", "DISP", "HP", "DRAT", "WT", "QSEC", "VS", "AM", "GEAR", "CARB"),
                            theme = ttheme('minimal',
                                           base_size = 12))

    # return table for viewing
    tbl_df

  })


  ## output plt2
  output$plt2 <- renderPlot({

    vals$plt2 <- cyl_df() %>%
      ggplot(aes(x = disp, y = hp)) +
      geom_point(size = 4) +
      theme_bw() +
      labs(x = "disp",
           y = "hp",
           title = "hp ~ disp") +
      theme(axis.text = element_text(size = 12, face = "bold"),
            axis.title = element_text(size = 15, face = "bold"),
            plot.title = element_text(size = 20))

    vals$plt2

  })


  ## The element vals will store all plots and tables
  vals <- reactiveValues(plt1=NULL,
                         plt2=NULL,
                         tbl=NULL)


  ## clicking on the export button will generate a pdf file
  ## containing all stored plots and tables
  output$export = downloadHandler(
    filename = function() {"plots.pdf"},
    content = function(file) {
      pdf(file, onefile = TRUE, width = 15, height = 9)
      grid.arrange(vals$plt1,
                   vals$tbl,
                   vals$plt2,
                   nrow = 2,
                   ncol = 2)

      dev.off()
    })
}
Here is what the shiny app will look like when you run it:
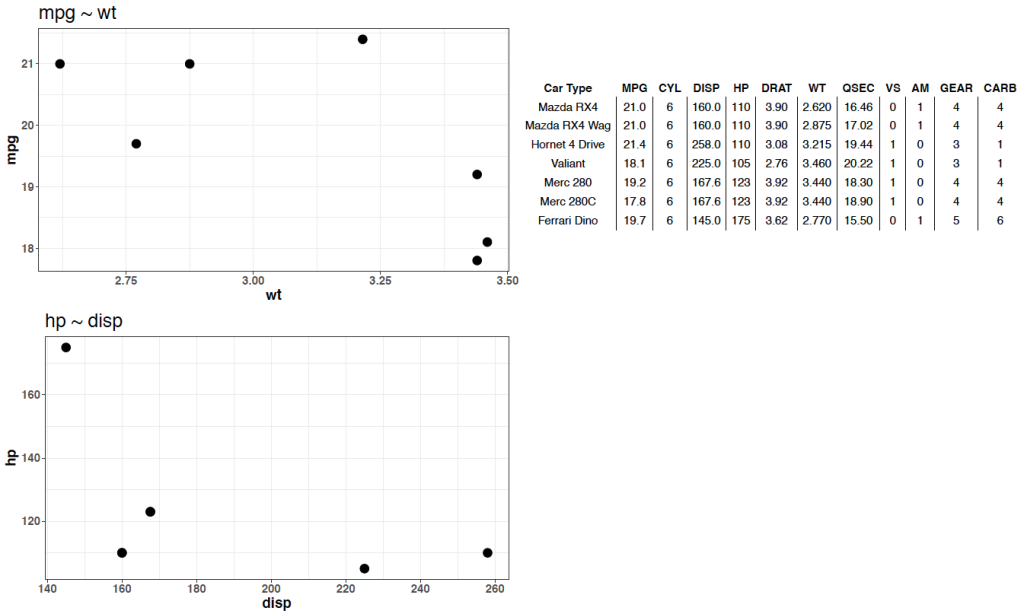
When the user clicks the Download button on the upper left, they can save a PDF, which looks like this:
Notice that we are returned the plots and table from the {shiny} app, however we don’t have the overall title. I’m sure we could remedy this within the server, but what if we want to simply produce a PDF that looks exactly like what we see in the web app?
App 2: Take a screen shot of your shiny app!
If we want to have the downloadable output look exactly like the web app, we can use the package {shinyscreentshot}.
The user interface of the app will remain the same. The server will change as you no longer need to store the plots. You simply need to add an observeEvent() function and tell R that you want to take a screenshot of the page once the button is pressed!
Since we are taking a screen shot I also took the liberty of changing the table of data to a {DT} table. I like {DT} tables better because they are interactive and have more functionality. In the previous {shiny} app it was harder to use that sort of interactive table and store it for PDF printing. Since we are taking a screenshot, it opens up a lot more options for us to customize the output.
Here is what the server looks likes:
server <- function(input, output){

  ## filter cylinder
  cyl_df <- reactive({

    req(input$cyl)

    d <- dat %>%
      filter(cyl == input$cyl)
    d

  })


  ## output plt1
  output$plt1 <- renderPlot({ cyl_df() %>%
      ggplot(aes(x = wt, y = mpg)) +
      geom_point(size = 4) +
      theme_bw() +
      labs(x = "wt",
           y = "mpg",
           title = "mpg ~ wt") +
    theme(axis.text = element_text(size = 12, face = "bold"),
          axis.title = element_text(size = 15, face = "bold"),
          plot.title = element_text(size = 20))

  })

  ## output table
  output$tbl <- renderDT({ cyl_df() %>%
      datatable(class = 'cell-border stripe',
                rownames = FALSE,
                filter = "top",
                options = list(pageLength = 4),
                colnames = c("Car Type", "MPG", "CYL", "DISP", "HP", "DRAT", "WT", "QSEC", "VS", "AM", "GEAR", "CARB"))

  })

  ## output plt2
  output$plt2 <- renderPlot({ cyl_df() %>%
      ggplot(aes(x = disp, y = hp)) +
      geom_point(size = 4) +
      theme_bw() +
      labs(x = "disp",
           y = "hp",
           title = "hp ~ disp") +
    theme(axis.text = element_text(size = 12, face = "bold"),
          axis.title = element_text(size = 15, face = "bold"),
          plot.title = element_text(size = 20))


  })

  observeEvent(input$go, {
    screenshot()
  })
}
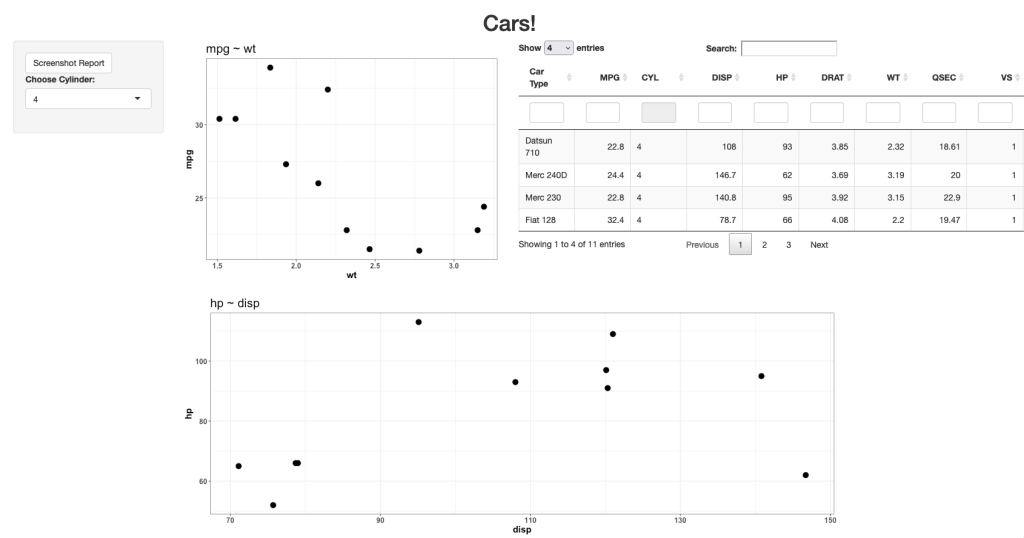
The new web app looks like this:
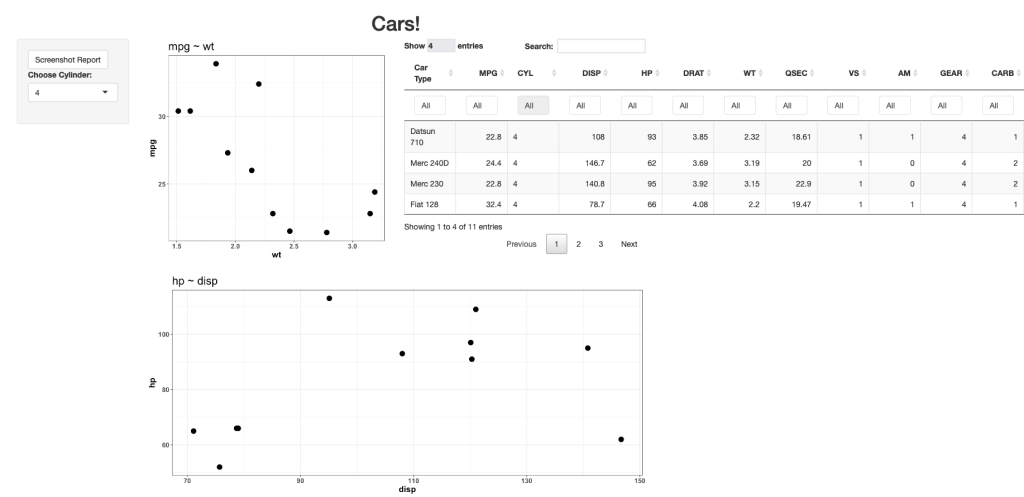
Looks pretty similar, just with a nicer table. If the user clicks the Screenshot Report at the upper left, R will save a png file of the report, which looks like this:
As you can see, this produces a downloadable report that is exactly like what the user sees on their screen.
Wrapping Up
There are two simple ways to build some save functions directly into your {shiny} apps. Again, if you’d like the full code, you can access it on my GITHUB page.


